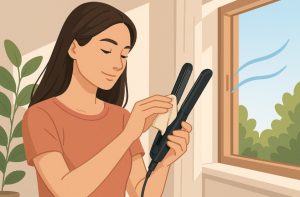
Have you ever wondered how clean your hair straightener really is? While it’s easy to focus on getting the perfect sleek look, it’s just as important to maintain the tool that helps you achieve it. Over time, your hair straightener collects residue from styling products, oils from your hair, and even dust from your surroundings. This build-up can quietly affect your straightener’s performance and, worse, the health of your hair.
Cleaning your hair straightener is not only about hygiene but also about getting the best results every time you use it. Just like you regularly clean your makeup brushes or your hairbrush, your straightener needs the same attention.
Whether you use it daily or occasionally, learning how to clean it properly at home can make a significant difference. In this guide, you’ll learn safe, effective methods to restore your straightener’s shine and functionality.
Why Should You Clean Your Hair Straightener Regularly?

A clean hair straightener is more than just a tidy tool, it’s essential for both safety and style. If your straightener has product residue or grime on its plates, it won’t glide smoothly through your hair, and worse, it could cause long-term damage. Regular cleaning keeps the plates working efficiently and protects your hair from unnecessary heat exposure or snagging.
When you skip cleaning your straightener, a few things can happen:
- Decreased performance: Residue from sprays, oils, and creams builds up on the plates, acting as a barrier that reduces heat transfer and makes straightening uneven.
- Hair damage: Product build-up can snag your hair, increase breakage, and cause split ends over time.
- Unpleasant odours: Burnt hair products can cause bad smells during use.
- Scalp irritation: Bacteria and product residue can transfer to your scalp, potentially leading to irritation or dandruff.
- Tool degradation: Over time, chemical reactions from heated build-up can wear down the coating on the plates, especially ceramic ones.
Cleaning your straightener regularly ensures it performs as intended while extending its lifespan. It keeps your styling routine safe and more efficient, leaving you with healthier hair and a tool that looks and works like new.
How Often Should You Clean Your Hair Straightener?
The frequency of cleaning depends on how often you use your straightener. Just like with any beauty tool, regular maintenance is key to longevity and hygiene. Ignoring the dirt and residue can lead to reduced effectiveness and even long-term damage to your hair.
Here’s a helpful guide:
- Daily use: Clean once a week to prevent heavy build-up and maintain top performance.
- Occasional use: Clean once every three to four weeks or after 3 to 5 uses.
- Visible build-up or odour: Clean immediately to prevent damage or unpleasant smells.
When deciding whether it’s time for a clean, look out for these signs:
- The plates appear cloudy or have a sticky feel.
- The straightener drags rather than glides through your hair.
- There’s a faint burning smell when the tool heats up.
- Your straightened hair looks dull or lacks shine despite styling.
Staying consistent with cleaning helps your hair look smoother and healthier while protecting the investment you’ve made in your styling tool.
What Do You Need to Clean a Hair Straightener?
Cleaning your hair straightener doesn’t require fancy tools or expensive solutions. In fact, most of the items you need can be found right at home. Before starting, make sure everything is on hand to streamline the process and ensure a safe, effective clean.
Here’s what you’ll need:
- Microfibre cloths: These are soft, non-abrasive, and perfect for wiping plates and exterior surfaces without scratching.
- Cotton pads or balls: Ideal for applying cleaning solutions like rubbing alcohol.
- Q-tips (cotton swabs): Great for reaching narrow areas between or around the plates.
- Rubbing alcohol (isopropyl alcohol): Effective for dissolving stubborn product build-up.
- Baking soda and water: Combined into a paste, this duo works well for deep cleaning.
- Small soft-bristle toothbrush: Gently scrubs paste into buildup without damaging the plates.
Avoid the following:
- Metal tools or sharp objects
- Harsh chemical cleaners
- Soaking the straightener in water
Having these items ready makes the cleaning process quick and safe, allowing you to remove grime without risking damage to your device.
What’s the Safest Way to Start Cleaning a Hair Straightener?
Before you begin cleaning your straightener, safety should be your top priority. You’re dealing with an electrical device, so it’s crucial to handle it correctly to avoid any risk of injury or damage.
Follow these initial steps:
- Unplug the straightener: Never clean a device while it’s plugged in or still warm. Ensure it’s completely disconnected from any power source.
- Let it cool completely: Wait at least 30 minutes after use to avoid burns or heat damage to cleaning tools.
- Place on a safe surface: Use a flat, heat-resistant surface to work on while cleaning.
- Check for damage: Before cleaning, inspect the plates and cord for any signs of wear, fraying, or cracks. If damaged, avoid further use.
Cleaning should always be done with the device off and dry. You should never submerge the straightener in water or use excessive moisture near the plates. This step is about creating a safe environment and preparing the tool for a thorough and effective clean. Taking this time ensures both your safety and the long-term performance of your straightener.
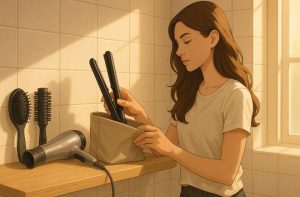
How to Clean Hair Straightener Plates Step by Step?

Cleaning your straightener plates is the most important part of the entire process. Product residue and hair oils build up quickly and can interfere with your results. Follow these simple yet effective steps for restoring your straightener.
For Light Build-up: Cloth and Water
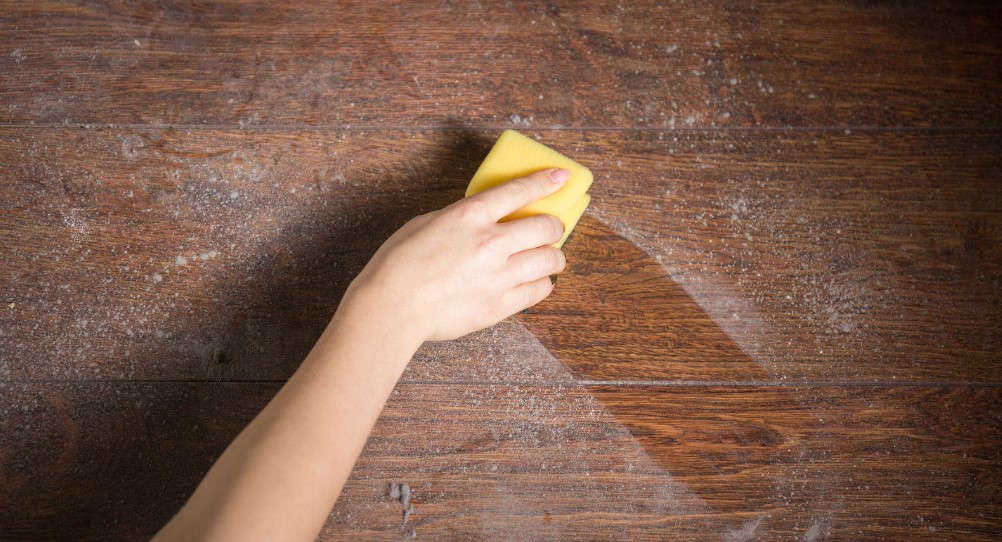
Light grime doesn’t require harsh chemicals. A damp microfibre cloth is often enough to clean it off. After unplugging and cooling your straightener, lightly moisten a cloth with water and gently wipe the plates. Use circular motions to lift any dust or mild product residue. Avoid pressing too hard, and make sure the cloth is not dripping wet.
For Product Build-up: Alcohol or Paste
If you notice sticky patches or hardened residue, use a cotton pad dampened with rubbing alcohol. Gently rub the affected areas until the residue begins to lift. For extra-stubborn grime, mix baking soda and water into a paste, apply it to the plates, and let it sit for 5–10 minutes before wiping.
Using Q-tips for Edges
Q-tips are ideal for reaching small gaps between the plates and along the edges. Dampen a Q-tip with alcohol or warm water, then carefully clean those tight spots that a cloth can’t reach. Rotate the swab as it gets dirty for a cleaner result.
Cleaning Around the Plates Gently
Don’t ignore the surrounding plastic or metal frame. Wipe it gently with a cloth to remove surface dust and product mist that might have settled. Make sure no moisture enters the device openings.
By following this step-by-step process, you can restore your straightener to its cleanest, most efficient state.
How to Deep Clean Hair Straightener Without Damaging It?
When surface cleaning isn’t enough, it’s time for a deeper approach. Deep cleaning is essential if the plates look burnt, the residue is baked on, or your straightener is giving off strange smells. Done right, this process revives your straightener and keeps it working like new.
1. Baking Soda Paste Method
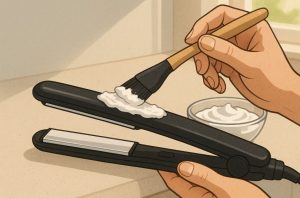
Mix two parts baking soda with one part water to create a thick paste. Use a soft cloth or toothbrush to apply the paste to stained areas of the plates. Let it sit for about 10 minutes, then gently scrub in a circular motion. This lifts heavy residue without scratching delicate surfaces. Finish by wiping with a damp cloth to remove any leftover paste.
2. Bristle Brush Technique
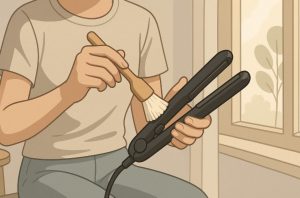
A soft toothbrush or small cleaning brush can be used to remove buildup along seams, plate edges, and hard-to-reach areas. Dampen it slightly with water or alcohol, then brush with care. Avoid vigorous scrubbing to prevent damage to coatings or electronics.
3. Final Drying and Inspection Tips
Once the cleaning is complete, use a dry microfibre cloth to remove all moisture. Leave the straightener in an open, ventilated area for a couple of hours to ensure it is completely dry before use. Check for any leftover residue or wet spots and re-wipe if needed. Deep cleaning should be done every few months or when regular cleaning no longer removes all the grime.
What Mistakes Should You Avoid When Cleaning a Hair Straightener?
Cleaning your hair straightener seems simple, but there are a few critical mistakes that can lead to permanent damage. Knowing what to avoid is just as important as knowing what to do.
Here are some common mistakes:
- Using too much water: Introducing water into the electrical parts can short-circuit the device or cause damage.
- Cleaning while plugged in or hot: This is dangerous and can cause burns or electric shock.
- Using abrasive tools: Metal or harsh scrubbing tools can scratch ceramic and titanium plates, reducing their efficiency.
- Skipping the drying step: Moisture left on the plates or inside the tool can cause corrosion or safety issues.
- Using harsh chemicals: Bleach, ammonia, or other strong substances can ruin the surface coating of the plates.
Always use gentle cleaning products and soft materials. Be patient during the process, and make sure everything is fully dry before plugging your device back in.
How Can You Maintain a Clean Straightener Long-Term?
Maintaining a clean straightener doesn’t require daily cleaning, but consistent habits will keep it working at its best. A little care after each use goes a long way in preventing future buildup and damage.
Here are some helpful practices:
- Wipe after every use: Quickly wipe down the plates with a dry cloth to prevent fresh residue from settling.
- Use a heat-resistant mat: This avoids picking up dust and debris from surfaces.
- Cool it down safely: Allow the straightener to cool before storing. Never wrap the cord around it when still hot.
- Store in a protective case: This shields the plates from scratches and dust accumulation.
- Avoid styling with dirty hair: Oils and products from unwashed hair increase the build-up on the plates.
By incorporating these habits, your straightener will stay cleaner for longer and require less deep cleaning.
Table: Quick Comparison of Cleaning Methods
Different levels of grime require different cleaning approaches. Here’s a quick table to help you choose the right method depending on the condition of your hair straightener.
| Cleaning Method | Best For | Tools Needed | Caution Tips |
| Damp Cloth | Light Dust and Grime | Microfibre Cloth, Water | Avoid excess moisture near seams |
| Rubbing Alcohol | Sticky Product Buildup | Cotton Pads, Alcohol, Cloth | Use in moderation and ventilated area |
| Baking Soda Paste | Heavy, Burnt Residue | Baking Soda, Water, Toothbrush | Rinse thoroughly and dry completely |
| Q-tips or Swabs | Small Gaps and Edges | Cotton Swabs, Water or Alcohol | Be gentle in narrow areas |
Understanding which method to use helps reduce cleaning time while achieving the best results for your specific needs.
Conclusion
Cleaning your hair straightener at home is a simple habit that delivers long-term benefits. Not only does it improve your tool’s performance, but it also protects your hair from unnecessary damage. With just a few household items and a bit of attention, you can remove buildup, extend the life of your straightener, and enjoy better styling results.
Whether you’re dealing with light grime or heavy residue, knowing the correct steps makes the process quick and safe. Don’t wait until your hair smells burnt or your straightener drags through your strands, start cleaning it today. Remember, a well-maintained tool equals a great hair day, every day.
FAQs
Can you clean a hair straightener with vinegar?
Yes, vinegar can help dissolve buildup naturally. Apply it sparingly with a cloth or cotton pad.
What causes the plates on my straightener to look burnt?
This usually happens from product residue burning at high temperatures. It can be reduced with proper cleaning and temperature control.
Is nail polish remover safe for cleaning straighteners?
Only acetone-free removers in small amounts are acceptable. Always test on a small area first.
How do you clean between the plates of your straightener?
Use a dampened cotton swab to gently clean tight spaces. Avoid forcing anything between the plates.
What’s the best cleaner for ceramic hair straighteners?
Rubbing alcohol or baking soda paste is best. They clean thoroughly without damaging ceramic surfaces.
How long should you wait after cleaning to use your straightener again?
Wait at least two hours or until it’s completely dry. Moisture can damage the internal electronics.
Can a dirty straightener damage your hair?
Yes, it can pull, snag, and overheat your strands. Clean plates ensure smoother, safer styling.