Welcome back, tech enthusiasts! If you’re like most people, your keyboard is an essential tool in your daily life. Whether for work, gaming, or simply browsing the internet, our keyboards often witness countless hours of use. But have you ever thought about how much dirt and grime can accumulate on those tiny keys? And How to clean a keyboard.
Fear not! In this blog post, we will guide you through a step-by-step process of how to clean a keyboard effectively. So grab your cleaning supplies, and let’s dive into this squeaky-clean adventure that will have your keyboard looking as good as new in no time!
Step-by-step Guide on How to Clean a Keyboard
Unplug and Turn Off Your Computer
To properly clean your keyboard, the first step is to unplug and turn off your computer. This is crucial to ensure no electrical currents run through the keyboard while you clean it. Additionally, turning off your computer will prevent accidental keystrokes or interference during cleaning.
Unplugging and turning off your computer eliminates potential damage risks to yourself and the device. It also allows for easier access to the keyboard without worrying about accidentally triggering any commands or functions. So, before you begin cleaning, take a moment to shut down your computer and unplug it from the power source. This simple precautionary measure will go a long way in ensuring a safe and effective cleaning process for your keyboard!
Turn the Keyboard Upside Down and Shake the Dirt Out
To start cleaning your keyboard, the first step is to unplug and turn off your computer. This will ensure no electrical currents run through the keyboard while you clean it. Once that’s done, you can turn the keyboard upside down and shake it well.
Any loose dirt, crumbs, or debris trapped between the keys will fall out by flipping the keyboard over. It’s amazing how much gunk can accumulate in there! Be sure to give it a few gentle taps on your hand or a soft surface to dislodge any stubborn particles. You’ll be surprised by what comes out!
Remember not to force anything out or hit the keys too hard, which may damage them. Let gravity do its work and see all that hidden dirt exit. Once you’re satisfied with shaking out all possible dirt from your keyboard, it’s time to move on to more thorough cleaning methods like using a brush or compressed air.
Remove Filth With a Brush
One of the first steps to effectively clean your keyboard is to remove any visible filth with a brush. This includes crumbs, dust, and other debris that may have accumulated between or underneath the keys.
Start by gently turning your keyboard upside down over a trash can or a clean surface. Give it a few gentle shakes to dislodge any loose dirt. Next, take a soft-bristled brush and carefully sweep along the edges and in between the keys to loosen up any stubborn grime. Be sure to pay extra attention to areas where particles get trapped.

By removing filth with a brush, you are taking an important step towards maintaining cleanliness and functionality for your keyboard. Remember to be gentle during this process, as excessive force could damage the keys or their mechanisms.
Use Compressed Air to Remove the Dust
Now that you’ve shaken off the loose dirt and removed any visible filth, it’s time to tackle those stubborn dust particles hiding between the keys. For this purpose, compressed air is a useful tool.
First, ensure that your computer is still unplugged and turned off. Then, grab a can of compressed air specifically designed for cleaning electronics. Hold the can upright and use short bursts of air to blow away the dust from all angles.
Pay extra attention to hard-to-reach areas like crevices or spaces between keys. The forceful blast of air will dislodge any trapped debris, sending it flying out from under the keyboard. Remember not to tilt or shake the can too much while using it – keep it straight up and down for maximum effectiveness.
Compressed air will effectively remove most accumulated dust without damaging delicate components inside your keyboard. This method saves you time and effort by quickly and efficiently eliminating hidden grime!
Vacuum the Keyboard
Now, it’s time to give your keyboard a thorough vacuuming. This step will help remove any remaining dirt and debris between the keys.
First, grab your handheld vacuum cleaner or use the brush attachment on your regular vacuum cleaner. Gently run it over the keyboard’s surface, reaching all areas around each key. The suction power of the vacuum will effectively suck up any crumbs or dust hiding in those hard-to-reach spots.
Next, use a small nozzle attachment or a clean makeup brush to focus on individual keys. This will allow you to target specific areas and ensure no speck of dirt is left behind.
Remember to be gentle while applying pressure not to damage any delicate components underneath.
Use Rubbing Alcohol-dipped Cotton Swabs
Paying attention to the individual keys is important to clean your keyboard thoroughly. One effective method is to use a cotton swab dipped in rubbing alcohol.

First, ensure your computer is still unplugged and turned off before proceeding. Take a cotton swab and dip it lightly into rubbing alcohol, ensuring it is not wet. Gently run the swab over each key, applying slight pressure to remove any dirt or grime that may have accumulated.
Rubbing alcohol is an excellent cleaning agent as it evaporates quickly without leaving any residue. This helps prevent damage to the keyboard while effectively removing stubborn stains or stickiness from daily use.
Remember, always be careful not to oversaturate the cotton swab with rubbing alcohol, as excessive moisture can harm the internal components of your keyboard. Take your time and thoroughly clean each key individually for optimal results.
Polish With a Lint-free Cloth
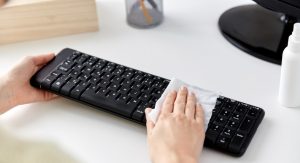
After using the rubbing alcohol, it’s time to give your keyboard a final polish with a lint-free cloth. This step will help remove any remaining residue and leave your keyboard shiny and new.
Take a clean, lint-free cloth and dampen it slightly with water or an electronics cleaner. Gently wipe down the keys, reaching all the nooks and crannies. Use a gentle circular motion to remove smudges or fingerprints lingering on the keys’ surface.
Remember to avoid using excessive moisture, as this can damage your keyboard. Also, be careful not to press too hard while polishing; this could damage the keys or push dirt back into them.
Conclusion
To conclude, cleaning your keyboard is essential in maintaining its functionality and longevity. Following these simple steps on how to clean a keyboard blog, you can ensure your keyboard remains free from dirt, dust, and grime.
Remember always to unplug and turn off your computer before starting the cleaning process. Then, turn the keyboard upside down and gently remove any loose debris. Use a brush to remove any remaining filth, reaching between the keys.
Next, use compressed air to blow away stubborn dust particles. This will help dislodge any hidden dirt that may have accumulated over time. Follow up by vacuuming the keyboard using a small brush attachment or a handheld vacuum cleaner with a gentle setting.
For those hard-to-reach areas or stubborn stains on your keys, dip a cotton swab in rubbing alcohol and carefully clean them one by one. The alcohol will help disinfect the surface of the keys while removing grime effectively.
Polish your keyboard using a lint-free cloth for a pristine finish. Gently wipe down each key until it shines bright once again.
By giving proper care to our keyboards now, we can extend their lifespan and enjoy comfortable typing experiences for years to come!
So grab some supplies and give that dirty keyboard some well-deserved TLC today!