Is the condition of your shower head getting worse? Does it seem like the water pressure just isn’t what it used to be? It might be time to give your shower head some much-needed TLC. Cleaning your shower head is essential for maintaining its performance and can also improve the quality of your showers. In this guide, we’ll show you step-by-step how to clean a shower head and bring back that refreshing spray you’ve been missing out on. So grab your cleaning supplies, and let’s get started!
Tools and Materials Needed for Cleaning a Shower Head
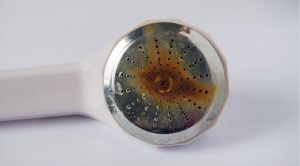
You’ll need a few basic tools and materials to clean your shower head effectively. First off, you’ll want to grab an adjustable wrench or pliers to remove the shower head from the pipe. It will be simpler to access every place for cleaning as a result. Next, gather some white vinegar or a descaling solution of your choice. Vinegar is a great natural option that helps break down mineral buildup and disinfects at the same time.
In addition to vinegar, you’ll also need a small plastic bag or container large enough to fit your shower head fully submerged in the cleaning solution. A toothbrush with soft bristles will come in handy when scrubbing away any stubborn residue on the surface of the shower head. Have some clean water available for rinsing off the cleaned shower head once you’re done.
Having these tools and materials ready will ensure that you have everything necessary for a thorough cleaning session. So, let’s move on to our step-by-step guide and get that shower head sparkling again!
The Importance of Cleaning Your Shower Head
Keeping your shower head clean and free of buildup is important for the appearance of your bathroom and your health and well-being. A dirty showerhead can harbour bacteria, mould, and other allergens that can be harmful to you and your family. In addition, a clogged or blocked shower head can reduce water flow, making it less effective at providing a satisfying shower experience.
Regularly cleaning your shower head is essential in maintaining its functionality and prolonging its lifespan. Over time, mineral deposits from hard water can accumulate inside the shower head nozzles, causing them to become clogged or restricted. This buildup affects water pressure and leads to uneven distribution of water across the body.
Cleaning your shower head regularly ensures that every spray delivers optimal performance while enjoying a refreshing and invigorating bathing experience. Moreover, removing any accumulated debris helps prevent potential plumbing issues down the line by ensuring smooth water flow throughout the system.
Step-by-step Guide on How to Clean a Shower Head
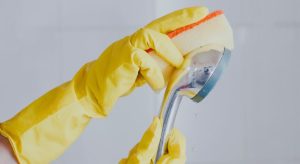
Cleaning your shower head is essential to maintaining a clean and hygienic bathroom. By removing mineral deposits and grime, you can ensure that your shower head continues providing a strong and even water flow. With just a few simple steps, you can easily clean your shower head and enjoy a refreshing shower every time. Let’s take a look at those steps.
Step 1: Remove the Shower Head From the Pipe
To begin the process of cleaning your shower head, you’ll first need to remove it from the pipe. This step might seem intimidating at first, but don’t worry, it’s actually quite simple!
Start by turning off the water supply to your shower. Then, use an adjustable wrench or pliers to loosen and unscrew the shower head from the pipe. Be careful not to damage any surrounding tiles or fixtures in the process.
Once you’ve successfully removed the shower head, set it aside for now. This will allow you better access for cleaning and ensure that no debris or residue ends up back in your pipes when you start scrubbing.
Now that we’ve got our shower head detached and ready for a thorough cleaning let’s move on to Step 2, where we’ll prepare a powerful cleaning solution!
Step 2: Prepare a Cleaning Solution
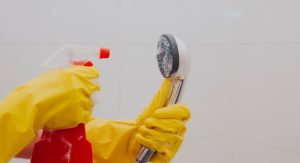
You’ll need to prepare a cleaning solution to effectively clean your shower head. This solution will help break down any mineral deposits or grime that have built up over time. Luckily, you don’t need any fancy or expensive products for this step – just a few household items will do the trick.
One popular and effective cleaning solution is vinegar. Simply mix equal parts white vinegar and water in a container large enough to submerge the shower head. The acidity of the vinegar helps dissolve mineral deposits, leaving your shower head sparkling clean.
If you prefer a natural alternative, another option is using lemon juice. Squeeze fresh lemon juice into a bowl and add equal water. Lemon juice contains citric acid, which can also effectively remove buildup from your shower head.
Step 3: Soak the Shower Head in the Solution
Now that you have removed the shower head, it’s time to give it a deep cleanse. This step involves soaking the shower head in a cleaning solution to remove any built-up grime or mineral deposits.
First, find a container large enough to fully submerge the shower head. Fill it with equal parts of vinegar and water, creating a powerful natural cleaning solution. The acidity of vinegar helps dissolve stubborn limescale and mineral buildup.
Next, carefully place the shower head into the solution and ensure that it is completely submerged. Allow it to soak for at least 30 minutes or overnight for more severe cases of buildup. This soaking process will loosen any dirt or debris lodged within the tiny nozzles.
Step 4: Scrub and Rinse the Shower Head
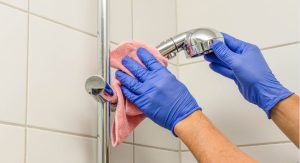
Now, it’s time to roll up your sleeves and give that shower head a good scrub. Start by using an old toothbrush or a small brush with soft bristles. Gently scrub all the nooks and crannies of the shower head, paying extra attention to any areas with built-up mineral deposits or grime.
Once you’ve thoroughly scrubbed the shower head, it’s time to rinse away all the dirt. Use warm water from your sink or bathtub to flush out any remaining cleaning solution and debris. Make sure to remove all traces of soap or cleaner from the shower head’s exterior and interior.
After rinsing, take a clean cloth or towel and wipe down the entire surface of the shower head until it is dry. This will help prevent leftover moisture from causing mould or mildew growth between cleanings.
Remember, regular maintenance is key when it comes to keeping your shower head clean and functioning properly. So make sure to include this step in your routine cleaning schedule for a sparkling clean shower experience!
Step 5: Reattach the Shower Head to the Pipe
Now that you’ve thoroughly cleaned your shower head, it’s time to reattach it and enjoy a refreshing shower experience. Follow these simple steps to ensure a secure and leak-free connection.
First, carefully align the shower head with the pipe opening. Take note of any washers or O-rings that may need to be in place for a tight seal. Gently screw the shower head onto the pipe by turning it clockwise. Use your hands at first, then finish tightening with an adjustable wrench if necessary.
Once you have securely tightened the shower head, turn on the water supply to check for leaks. If you notice any drips or leaks, try tightening it further or consider replacing worn-out washers or O-rings.
By following these steps, you can easily reattach your clean shower head and enjoy its full functionality once again!
Natural Alternatives to Chemical Cleaners
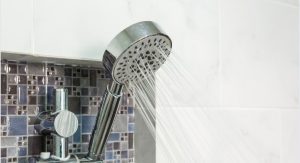
If you’re concerned about using harsh chemical cleaners to clean your shower head, don’t worry – natural alternatives can get the job done just as effectively! These options are safer for you and the environment and can also be found in your kitchen pantry.
One popular natural cleaner is vinegar. Its acidity helps break down mineral deposits and kill bacteria. Simply mix equal parts white vinegar and water in a bowl or baggie, then submerge your shower head in the solution for a few hours or overnight. After soaking, give it a good scrub with an old toothbrush and rinse thoroughly.
Another option is baking soda. This versatile ingredient not only cleans but also deodorizes. Create a paste by mixing baking soda with enough water to form a thick consistency. Apply the paste to your shower head and let it sit for about 15 minutes before scrubbing gently and rinsing off.
Opting for these natural alternatives lets you keep your shower head sparkling clean without exposing yourself or the planet to harmful chemicals!
Conclusion
By following our step-by-step guide on how to clean a shower head, you’ll be able to remove any clogs or residue that may affect water flow and pressure. Remember to detach the shower head from the pipe, prepare a cleaning solution, soak it for some time, scrub away any impurities, rinse thoroughly, and reattach it securely.
Keeping your shower head clean improves its performance and prevents potential health hazards caused by bacteria and mould buildup. By regularly cleaning your shower head, you can ensure a refreshing and invigorating shower experience every time.
So, next time you notice a decrease in water pressure or see residue on your shower head, don’t hesitate to give it a good clean. With these simple steps, you’ll have a sparkling clean showerhead in no time!


