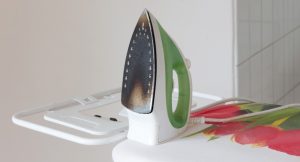
Are you tired of your iron leaving unsightly stains on your clothes? It might be time to give some love and attention to those often-overlooked steam vents. Cleaning the steam vents in your iron not only ensures better performance but also prolongs the lifespan of this essential appliance. In this guide, we’ll walk you through step-by-step instructions on how to clean an iron steam vents effectively so you can say goodbye to stubborn marks and hello to crisp, fresh clothes! Let’s dive in.
Importance of Cleaning Iron Steam Vents
Have you ever noticed a strange odour when using your iron? It could be a sign that the steam vents need cleaning. Over time, mineral deposits and residue can build up in the vents, affecting the quality of steam produced. This buildup not only hinders the iron’s performance but can also transfer onto your clothes, leaving behind unsightly marks.

Cleaning the steam vents regularly ensures that your iron operates efficiently, providing powerful bursts of steam to tackle wrinkles effectively. By maintaining clean steam vents, you’ll extend the life of your iron and prevent potential damage caused by clogs or blockages. Plus, with cleaner vents, you’ll achieve smoother results on your garments without worrying about stains or odours sneaking their way onto your favourite outfit.
The Dangers of Not Cleaning Iron Steam Vents
Neglecting to clean your iron steam vents can lead to various dangers that not only affect the performance of your iron but also pose risks to your health and clothing. Over time, mineral deposits from tap water can accumulate in the vents, clogging them and preventing steam from flowing smoothly. This blockage can result in uneven heat distribution, causing potential damage to delicate fabrics during ironing.
When steam vents are not cleaned regularly, they may release built-up residue onto your clothes, leaving unsightly stains that are difficult to remove. In addition, the trapped dirt and debris in the vents create a breeding ground for bacteria and mould growth. These contaminants can be released onto your garments when you use the iron, potentially causing skin irritation or respiratory issues.
By neglecting proper maintenance of your iron’s steam vents, you not only risk damaging your clothing but also jeopardize your well-being. Regular cleaning is essential to ensure optimal performance and prolong the lifespan of your iron while maintaining a safe environment for both yourself and your wardrobe.
Step-by-Step Guide on How to Clean an Iron Steam Vents
When it comes to keeping your iron in top condition, cleaning the steam vents is crucial. Over time, mineral deposits and residue can build up, affecting the performance of your iron. To effectively clean the steam vents, you’ll need a few basic materials on hand.

Materials Needed
When it comes to cleaning your iron steam vents, having the right materials on hand is essential for achieving optimal results. Here’s a list of items you’ll need to effectively clean those stubborn vents and keep your iron in top shape.
First up, grab some distilled water. This will be used for flushing out any residue or buildup that may be clogging the steam vents. Distilled water is preferred as it doesn’t contain minerals that could further block the openings.
Next, you’ll need white vinegar. Vinegar is a powerful natural cleaner that can help break down any limescale or mineral deposits inside the steam vents. It’s an effective and affordable solution for keeping your iron functioning smoothly.
Additionally, gather some cotton swabs or Q-tips to reach into those narrow vent openings and remove any remaining debris. These handy tools are perfect for getting into tight spaces where larger cleaning tools might not reach.
Have a clean microfiber cloth or sponge ready to wipe down the exterior of the iron after cleaning the steam vents. Keeping both the inside and outside of your iron clean will ensure it continues to work efficiently for years to come.
Preparation Steps
Before diving into cleaning your iron steam vents, it’s essential to prepare properly. Start by gathering the necessary materials: a clean cloth, distilled water, white vinegar, cotton swabs, and a toothpick. Having everything ready will make the process smoother.
ext, make sure your iron is unplugged and completely cooled down before beginning any cleaning activities. Safety first! You don’t want to risk burning yourself during the process.
Inspect the steam vents to assess the level of buildup or residue present. This will help you determine how much effort might be needed to get them sparkling clean again.
Open up windows or work in a well-ventilated area to avoid inhaling any fumes that may arise from using cleaning agents like vinegar. Proper ventilation is key for a comfortable and safe cleaning experience.
Now that you’re prepared and have assessed the situation, you’re ready to tackle those stubborn steam vents and bring back their efficiency!
Cleaning Process
Now that you’ve gathered all the necessary materials and prepared your iron for cleaning, it’s time to tackle the actual cleaning process of the steam vents. Begin by ensuring your iron is completely cooled off before proceeding.
Next, dip a cotton swab or old toothbrush into a solution of equal parts water and vinegar. Gently scrub the vents with the dampened tool to loosen any stubborn residue buildup.
For tougher stains or mineral deposits, consider using a mixture of baking soda and water as a gentle abrasive cleaner. Apply the paste to the affected areas and let it sit for few minutes before wiping it away.
Once you’ve thoroughly cleaned the steam vents, wipe down the entire surface with a clean cloth dampened with water to remove any remaining cleaning solution.
Remember that regular maintenance is key to keeping your iron in optimal condition for smooth and efficient steaming sessions.
Removing Residue Buildup
Iron steam vents can easily accumulate residue buildup over time, affecting the efficiency of your iron. This residue is often a result of minerals in the water used in the iron or fabric starches that have been scorched onto the vents.
To tackle this issue, start by unplugging the iron and letting it cool down completely before proceeding with cleaning. Once cooled, mix equal parts of distilled white vinegar and water in a container.

Dip a cotton swab into the solution and gently rub it along the steam vents to help break down and loosen any built-up residue. You may also use a soft-bristled brush for this step if needed.
For stubborn residue, consider using a mixture of baking soda and water to create a paste-like consistency. Apply this paste to the affected areas and let it sit for a few minutes before wiping it off with a damp cloth.
Regularly removing residue buildup from your iron’s steam vents will not only improve its performance but also prolong its lifespan.
Disinfecting and Sanitizing the Vents
Disinfecting and sanitizing the vents of your iron is crucial to ensure cleanliness and prevent bacteria buildup. To start this process, mix equal parts of water and white vinegar in a spray bottle. Vinegar acts as a natural disinfectant that helps eliminate germs effectively.
Spray this solution into the steam vents of the iron while it’s still warm but unplugged. The heat will aid in loosening any stubborn residue within the vents. After spraying, use a cotton swab or a small brush to gently scrub the vents and remove any remaining dirt or grime.
Once you’ve cleaned all areas thoroughly, let the vinegar solution sit for about 10-15 minutes to allow it to disinfect properly. Afterward, wipe down the vents with a damp cloth to remove any excess vinegar and residue left behind.
Regularly disinfecting your iron’s steam vents not only keeps them clean but also ensures that you are using a hygienic appliance every time you press your clothes.
Proper Maintenance for Long-Term Cleanliness
To ensure long-term cleanliness and optimal performance of your iron, regular maintenance is key. After cleaning the steam vents thoroughly, it’s important to maintain them properly to prevent future buildup and clogs.
One way to maintain cleanliness is by using distilled water in your iron instead of tap water. Distilled water helps reduce mineral deposits that can accumulate in the steam vents over time.
Additionally, always empty any remaining water from the iron after each use to prevent stagnant water from sitting in the reservoir and potentially causing mould or mildew growth.
Another tip for proper maintenance is to store your iron in a cool, dry place when not in use. This helps prevent dust and debris from settling into the vents while also prolonging the life of your appliance.
By incorporating these simple maintenance practices into your routine, you can enjoy a clean and efficient iron for years to come!
Conclusion
Taking the time to clean your iron steam vents is a simple yet crucial task that can extend the lifespan of your iron and ensure optimal performance. By regularly maintaining and sanitizing the steam vents, you can prevent potential issues like spitting water or staining clothes during ironing sessions. Follow the step-by-step guide provided in this article, use the necessary materials, and incorporate proper maintenance practices for long-term cleanliness. Your efforts will not only keep your iron in top condition but also help you achieve crisp and wrinkle-free results every time you press your garments. Happy cleaning!


