Are you tired of straining to hear your favourite tunes or missing important phone calls because of a muffled or distorted iPhone speaker? Don’t worry. We’ve got you covered! In this blog post, we’ll show you the best methods for how to clean iPhone speaker so that it’s crystal clear and back to its optimal performance.
Whether you’re dealing with dirt, debris, or water damage, our expert tips and tricks will have your speaker sounding better than ever in no time. So grab your cleaning supplies, and let’s dive into the world of pristine sound quality!
Check if Your iPhone Speaker is Working
Is your iPhone speaker not producing any sound? Before you jump to the conclusion that it’s dirty and needs cleaning, it’s important to first check if the speaker is actually working. Here are a few quick steps to help you determine whether your iPhone speaker is functioning properly or not.
First, make sure that the volume on your device is turned up and not muted. It may seem obvious, but sometimes we overlook simple settings. Next, try playing audio through different apps or media sources like music or videos. If there is still no sound coming from the speaker, try plugging in headphones to see if you can hear anything through them. If you do hear sound through the headphones but not from the iPhone speaker itself, then there might be an issue with your device’s hardware.
Test the speaker by making a phone call and checking if you can hear the other person on the line clearly without using headphones or Bluetooth devices. If everything checks out fine during these tests and there are no other noticeable issues with your device, then it’s likely time to clean your iPhone speaker!
How to Clean iPhone Speaker?
First things first, before attempting to clean your iPhone speaker, make sure you have turned off your device. This will prevent any accidental damage and ensure a safe cleaning process.
To start with the cleaning process, use a soft-bristled brush or an unused toothbrush to gently remove any visible dust or debris from the speaker grill. Be careful not to press too hard, as this could potentially damage the delicate components of your phone.
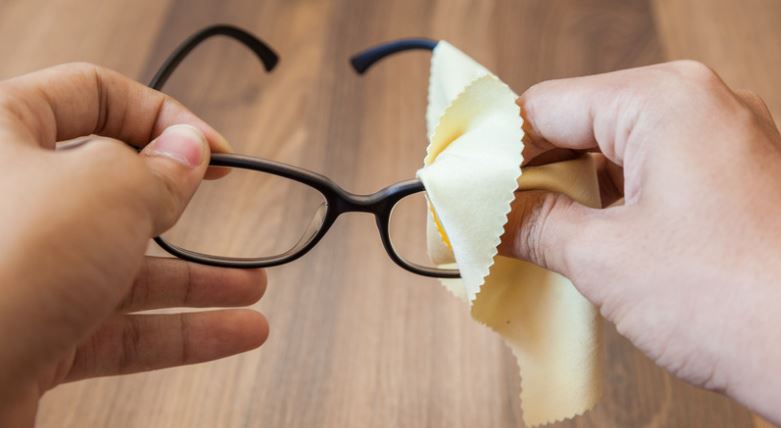
Next, grab a microfibre cloth or a cotton swab slightly dampened with water (avoid using excessive moisture) and carefully wipe the speaker grill in circular motions. This will help dislodge stubborn dirt particles that may have accumulated over time.
For those persistent grime spots that refuse to budge, you can try using compressed air. With short bursts of air directed towards the speaker grill, it can effectively blow away trapped debris without causing harm.
If you’re still experiencing issues with sound quality after cleaning, there is another method you can try – using tape! Simply take a small strip of adhesive tape and gently press it onto the speaker grill. Peel it off slowly and repeat if necessary; this technique can sometimes pick up finer particles that were missed during initial cleaning.
Remember, when dealing with electronics like iPhones, caution is key. Avoid using harsh chemicals or abrasive materials, as these can cause irreversible damage to your device’s speakers. Stick to the gentle methods mentioned above for optimal results!
By following these simple yet effective steps on how to clean your iPhone speaker properly, you’ll be amazed at how much better your audio experience will become. So go ahead and give your speakers some well-deserved TLC – they’ll thank you by delivering crisp and clear sound once again!
Do’s and Don’ts of Cleaning Your iPhone Speaker
When it comes to cleaning your iPhone speaker, there are certain do’s and don’ts that you should keep in mind. Following these guidelines will ensure that you clean your speaker effectively without causing any damage.
First and foremost, DO use a soft, lint-free cloth or a microfibre cloth to clean the exterior of your iPhone. Gently wipe away any dust or dirt particles that may have accumulated on the speaker grille. Avoid using abrasive materials or harsh chemicals, as they can scratch or damage the surface of your device.
Next, DON’T use compressed air or blow directly into the speaker grille. While this may seem like an easy way to remove debris, it can actually push particles further into the speaker and potentially cause more harm than good.
DO use a small brush with soft bristles to gently dislodge any stubborn dirt or debris from the speaker grille. Be careful not to apply too much pressure, as this could loosen internal components.
DON’T submerge your iPhone in water or use liquid cleaners directly on the speaker grille. Moisture can seep into sensitive areas of your device and lead to irreversible damage.
By following these dos and don’ts, you can effectively clean your iPhone speaker without risking any harm to your beloved device.
Apple’s Official Advice for Cleaning iPhone Speakers
Apple’s official advice for cleaning iPhone speakers is crucial to maintain the optimal performance of your device. The company recommends avoiding using any liquids or sharp objects when cleaning the speaker. Instead, they suggest using a soft brush or dry cloth to gently remove any debris that may have accumulated in and around the speaker area.
To clean your iPhone speaker:
- Start by turning off your device to prevent any accidental damage
- Use a soft-bristled brush or a clean, lint-free cloth to carefully wipe away any dust or dirt from the speaker grille and surrounding areas.
- Be sure not to apply too much pressure, as this could potentially cause damage
It’s important not to use liquids such as water or cleaning solutions on your iPhone speaker. These substances can seep into the internal components of the device and lead to further issues down the line.
Remember, prevention is key when it comes to keeping your iPhone speaker clean. Avoid exposing it to excessive moisture or environments with high levels of dust and debris. Regularly inspecting and gently cleaning your speaker will help ensure that you enjoy clear sound quality during calls, music playback, and other media experiences on your iPhone.
Troubleshooting iPhone Volume Issues
Are you experiencing issues with the volume on your iPhone? Don’t worry, you’re not alone. Many iPhone users encounter problems with their device’s volume from time to time. But before we dive into troubleshooting, let’s make sure it’s not a simple fix.
First, check if your iPhone is in silent mode or if the volume is turned all the way down. It might sound obvious, but sometimes the simplest solutions are overlooked. If that’s not the problem, try restarting your iPhone. This can often resolve minor software glitches that could be affecting the volume.
If neither of these steps solves the issue, it’s time to dig deeper. Check for any debris or dirt that may have accumulated in and around the speaker area of your iPhone. Gently clean it using a soft-bristled brush or compressed air. Be careful not to insert anything too sharp or abrasive, which could damage your speaker.
If cleaning doesn’t improve the situation, there may be an underlying software issue causing the problem. Consider updating your iOS software to ensure you have all available bug fixes and improvements installed.
Conclusion
In this article, we have discussed the importance of keeping your iPhone speaker clean and how to clean iPhone speaker effectively. We started by checking if the speaker was working properly and then delved into different methods for cleaning the speaker, such as using a soft-bristled brush, microfibre cloth, compressed air, and tape. We also mentioned some important dos and don’ts to keep in mind when cleaning your iPhone speaker.
We also discussed Apple’s official advice for cleaning the iPhone speaker and how prevention is key to keeping it clean. Lastly, we touched upon troubleshooting steps to take if you’re experiencing volume issues with your iPhone.
By following these tips and techniques, you can ensure that your iPhone speaker stays in top condition, providing you with clear and crisp sound quality for all your media experiences. So next time you notice a decline in sound quality from your iPhone speaker, don’t panic – just refer back to this article for a quick and easy solution!

