Are your makeup brushes looking a little worse for wear? Do they need some TLC to bring back their pristine condition? Well, you’ve come to the right place! In this article, we’ll show you how to clean makeup brushes like a pro. Not only is regular cleaning essential for maintaining the longevity of your brushes, but it’s also crucial for keeping your skin healthy and fresh. So whether you’re a beauty enthusiast or a professional makeup artist, grab your brush cleaner, and let’s dive into the world of squeaky-clean bristles!
Importance of Cleaning Makeup Brushes
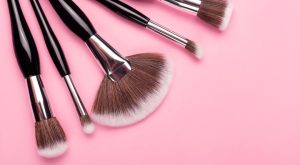
Keeping your makeup brushes clean is more than just a simple hygiene practice. It plays a crucial role in maintaining the overall health of your skin and ensuring flawless makeup application. When you use dirty brushes, they accumulate not only product buildup but also oil, bacteria, and dead skin cells. This can lead to clogged pores, breakouts, and even infections if left unchecked.
Not only that but cleaning your brushes regularly also helps preserve their longevity. Makeup residue can cause bristles to become stiff and brittle over time, resulting in subpar performance. By regularly cleaning your brushes, you ensure that they remain soft, pliable, and able to blend products seamlessly onto your skin.
Moreover, clean brushes provide a better colour payoff. When there’s the residual product on the bristles from previous uses, it can mix with new shades or alter their true pigmentation. Cleaning them thoroughly removes any traces of old colours or formulas so that each application appears vibrant as intended by the brand.
How Often Should You Clean Your Makeup Brushes?
How often should you clean your makeup brushes? This is a question many beauty enthusiasts ask themselves. The answer depends on how frequently you use them and the type of products you apply with them.
Ideally, it’s recommended to clean your makeup brushes at least once every two weeks. If you’re using heavy or oil-based products, such as foundation or cream eyeshadows, it’s best to clean them more often – about once a week. Regular cleaning not only helps maintain the performance of your brushes but also prevents bacteria buildup that can lead to breakouts and skin irritations.
Remember, the cleanliness of your makeup brushes directly affects the quality of your application and overall skincare routine. So, make it a habit to regularly cleanse those bristles for flawless results!
Step-by-step Guide on How To Clean Makeup Brushes
Taking proper care of your makeup brushes is essential for maintaining their quality and ensuring the best application of your cosmetics. By regularly cleaning your brushes, you can prevent bacteria buildup, extend their lifespan, and achieve flawless results every time you use them. Now, let’s dive into a step-by-step guide on how to clean makeup brushes.
Step 1: Gather All Necessary Supplies
To get started on cleaning your makeup brushes, it’s essential to gather all the necessary supplies. You don’t want to be caught without something crucial in the middle of the process! So, here are a few items you’ll need:
- A bowl or sink: This will be used to hold water for rinsing the brushes
- Lukewarm water: Make sure it’s not too hot or too cold, as extreme temperatures can damage the bristles
- Gentle cleanser or shampoo: Look for mild options that won’t strip away natural oils from the bristles
- Towel or paper towels: These will come in handy for drying and reshaping the brush bristles after washing
- Optional brush cleaner mat or glove: These tools can help deep clean your brushes more efficiently by removing built-up product residue
Remember, having everything prepared beforehand will make the cleaning process smoother and more efficient. So, gather these supplies and let’s move on to refreshing those dirty makeup brushes!
Step 2: Rinse the Brushes With Lukewarm Water
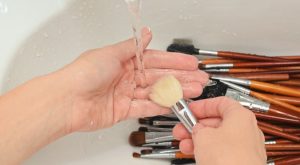
To effectively clean your makeup brushes, one of the first steps is to rinse them with lukewarm water. This helps to remove any residual makeup and product buildup from the bristles.
Start by holding the brush under running water, ensuring that you are rinsing both the bristles and the ferrule (the metal part that holds the bristles together). Gently massage the bristles using your fingertips to help loosen any stubborn residue.
Continue rinsing until you see that the water runs clear, indicating that all traces of makeup have been removed. Be careful not to use hot water as it can damage and deform the bristles over time. Lukewarm water is gentle enough while still being effective in cleaning your brushes thoroughly.
Step 3: Use a Gentle Cleanser or Shampoo to Clean the Bristles
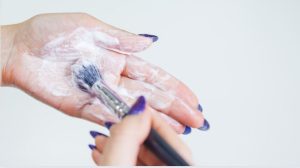
To thoroughly clean your makeup brushes, it’s important to use a gentle cleanser or shampoo on the bristles. This step ensures that all traces of dirt, oil, and product buildup are removed, leaving your brushes fresh and ready for future application.
When choosing a cleanser or shampoo, opt for one that is mild and free from harsh chemicals. A baby shampoo or a gentle facial cleanser works well in this case. These products effectively cleanse the bristles without causing damage or drying them out.
To clean the bristles, wet them with lukewarm water and apply a small amount of the chosen cleanser or shampoo onto your palm. Gently swirl the brush in circular motions to work up a lather. Pay extra attention to areas where makeup tends to accumulate, such as near the base of the bristles.
Rinse off the cleanser thoroughly under running water until no soap residue remains. Be sure to reshape the bristles while they are still damp by gently squeezing any excess water out and reshaping them into their original form. Lay flat on a clean towel to air dry completely before using again.
Step 4: Rinse Thoroughly and Reshape the Bristles
After you have cleaned your makeup brushes with a gentle cleanser or shampoo, it is crucial to rinse them thoroughly. This step ensures that all traces of soap and dirt are removed from the bristles. To do this, hold the brush under lukewarm water and gently massage the bristles with your fingers. Continue rinsing until the water runs clear.
Once you have rinsed off all the residue, it’s time to reshape the bristles. Gently squeeze out any excess water from the brush using a clean towel or paper towel. Then, carefully reshape each bristle by running your fingers along them in their natural direction. This keeps them from going damaged and helps preserve their original shape.
Reshaping is especially important for brushes with synthetic bristles as they can easily lose their form if not properly maintained. By taking these steps to rinse thoroughly and reshape your makeup brushes, you ensure that they are clean, free of residue, and ready for use!
Tips for Maintaining Clean Makeup Brushes
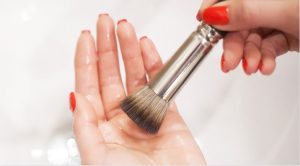
Maintaining clean makeup brushes is essential for the overall health of your skin and the longevity of your tools. Here are some useful tips to keep your brushes in pristine condition.
It’s important to store your brushes properly. Avoid leaving them exposed to dust or humidity, as this can lead to bacterial growth. Invest in a brush holder or organizer that keeps them upright and separated from each other.
Try to clean your brushes regularly. A general rule of thumb is once every two weeks for personal use and more frequently if you’re a professional artist or have acne-prone skin. Regular cleaning prevents the buildup of product residue and bacteria on the bristles.
Be gentle with your brushes during cleaning. Use lukewarm water instead of hot water, which can damage the bristles. When applying cleanser or shampoo, avoid using excessive force that could cause shedding or distortion in shape.
By following these tips, you’ll not only ensure cleaner makeup application but also extend the lifespan of your beloved brushes!
Common Mistakes to Avoid When Cleaning Makeup Brushes
The common mistakes you will do while cleaning a makeup brush are,
- Using Harsh Cleansers: One common mistake people make when cleaning makeup brushes is using harsh cleansers or detergents. These products can be too abrasive and strip the bristles of their natural oils, causing them to become dry and brittle over time. Instead, opt for a gentle cleanser or shampoo specifically formulated for delicate fibres.
- Skipping the Rinse Step: Another mistake is not rinsing the brushes thoroughly after cleansing. Leaving any residue on the bristles can lead to product buildup, which can affect how well your brushes perform and even cause breakouts on your skin. Take the extra time to ensure that all traces of cleanser are completely removed.
- Not Reshaping the Bristles: Many people forget to reshape their brushes after cleaning them. This step is crucial in maintaining the shape and integrity of your brush bristles. Gently squeeze out excess water from each brush and reshape them with your fingers before laying them flat or hanging them upside down to dry.
By avoiding these common mistakes, you can prolong the lifespan of your makeup brushes and ensure they continue providing flawless application every time!
When to Replace Your Makeup Brushes?
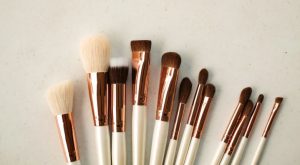
Knowing when to replace your makeup brushes is essential for maintaining good hygiene and achieving flawless makeup application. While quality brushes can last for several years with proper care, there comes a time when it’s necessary to bid them farewell.
The lifespan of makeup brushes depends on various factors such as frequency of use, cleaning routine, and the overall condition of the bristles. As a general rule of thumb, it’s recommended to replace your foundation and concealer brushes every 6-12 months. These brushes tend to accumulate more product buildup and bacteria due to their direct contact with liquid or cream formulas.
Eyeshadow brushes should be replaced every 1-2 years since they come in contact with powdered products that may settle into the bristles over time. Brushes used for powder blushes or highlighters can also last around 1-2 years if properly cleaned and maintained.
If you notice any shedding or splaying of the bristles, it’s a sign that your brush has reached its limit. Additionally, if you experience irritation or breakouts after using a particular brush, even after thorough cleaning, it’s best to retire it from your collection.
Investing in high-quality brushes not only ensures better performance but also extends their longevity. However, regardless of how well you care for them, all makeup brushes have an expiration date eventually. So keep an eye out for signs indicating that it’s time for some new tools!
Conclusion
Taking the time to clean your makeup brushes regularly is essential for maintaining healthy skin and achieving flawless makeup application. By following the step-by-step guide outlined in this how to clean makeup brushes article, you can ensure that your brushes are thoroughly cleaned and ready for use.
Regularly cleaning your makeup brushes also helps to maintain their longevity and prevent bacteria buildup that can lead to breakouts and infections. It’s recommended to clean your brushes at least once every two weeks or more frequently if you use heavy or oil-based products.
Knowing when to replace your makeup brushes is also crucial. Keep an eye out for shedding, splaying of the bristles, and any signs of irritation or breakouts after using a particular brush.
By following these tips and maintaining good hygiene practices, you can keep your makeup brushes in pristine condition and achieve flawless results every time you use them!


